How can we help?
USB Backup Configuration
Overview
Starting with version 7.3.0, users can now back up their system to a USB drive. This document provides instructions for locating the correct USB port and initiating the backup process.
System Requirements
- System version 7.3.0 or higher
- USB drive formatted as FAT with 64GB or greater storage capacity
Important Note
The USB drive must be formatted as FAT or it will not work with the Rapta system.
Recommended USB Device
We have tested and confirmed operation with numerous USB SSD drives including the HP P500 1TB USB-C External Solid State Drive.
USB Port Location
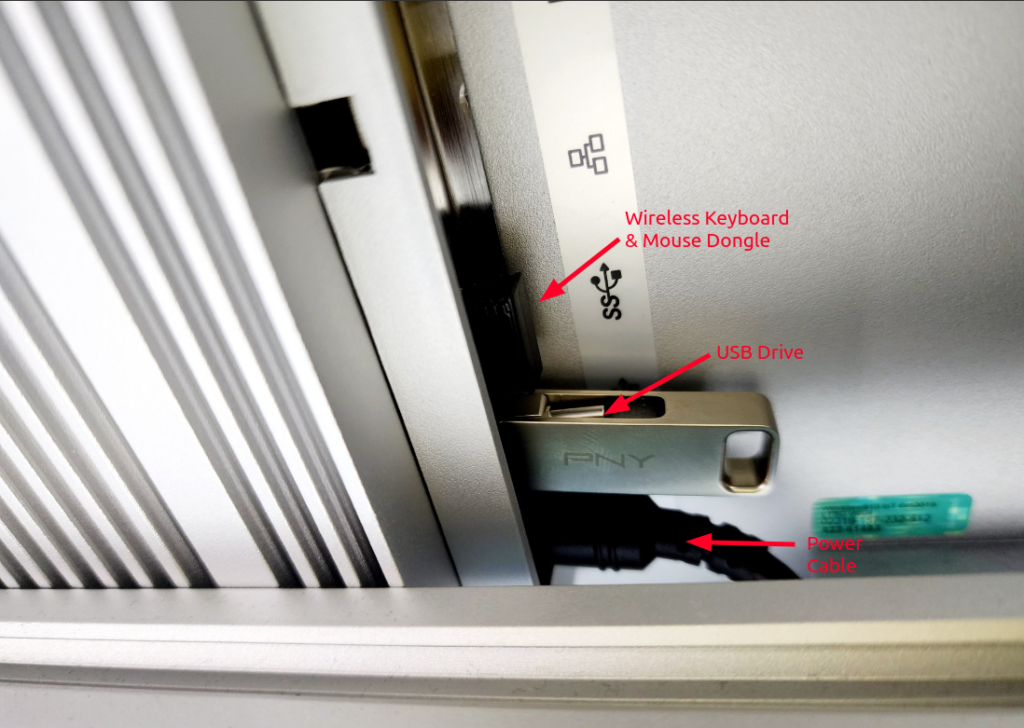
The high-speed USB port for system backup is located on the touch-panel computer:
- On the back of the touch-panel
- Right-hand side
- Just above the power cord
- Directly below the Wireless Keyboard & Mouse Dongle
Visual Reference
Backup Configuration Steps
- Login as Supervisor
- Navigate to the Setup/Backup Page
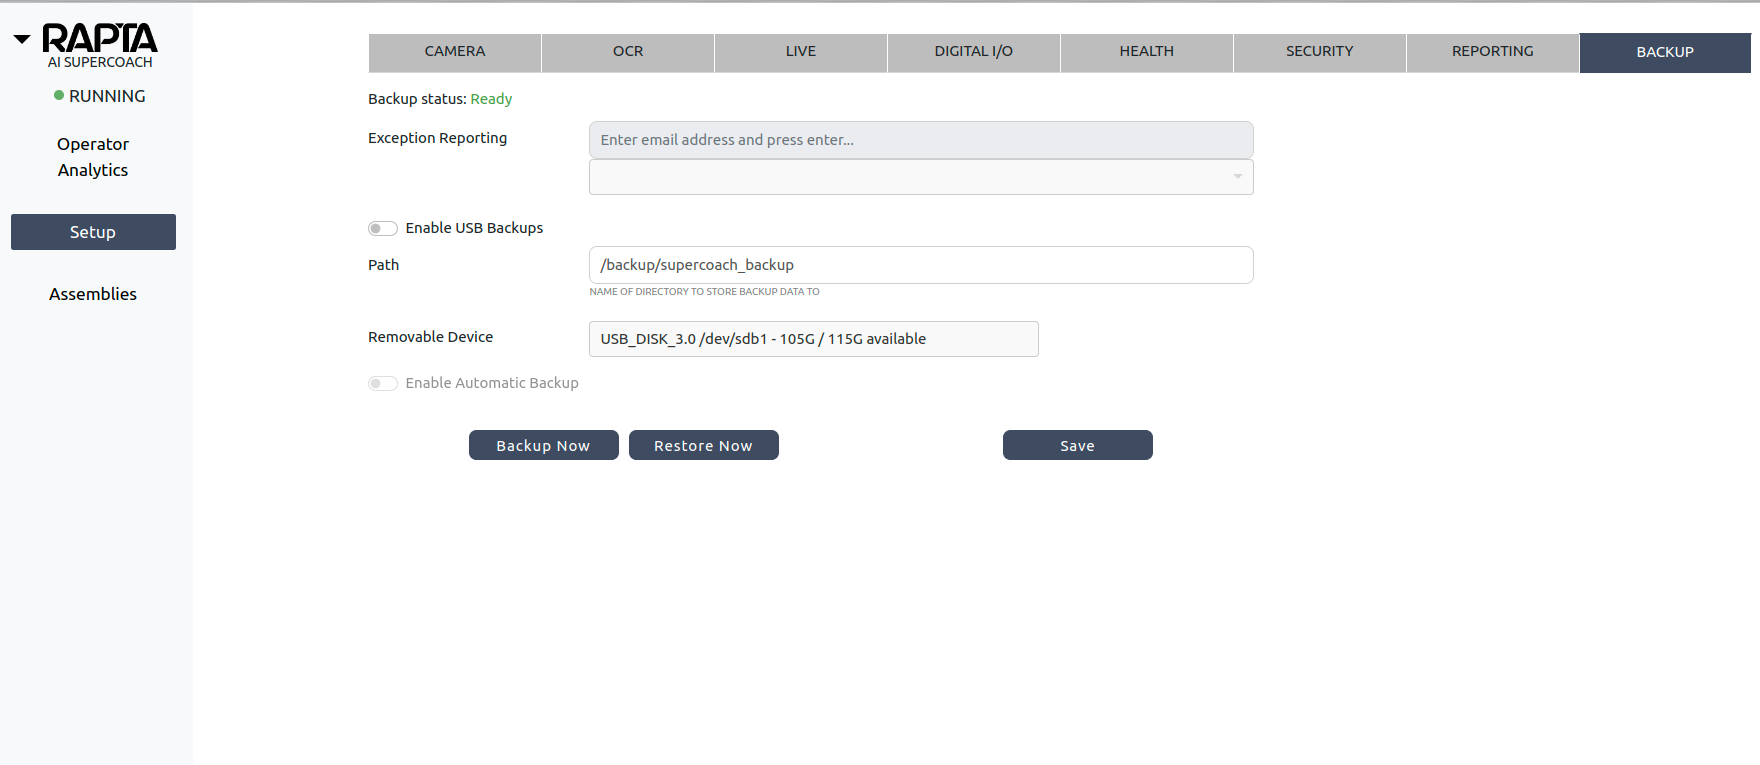
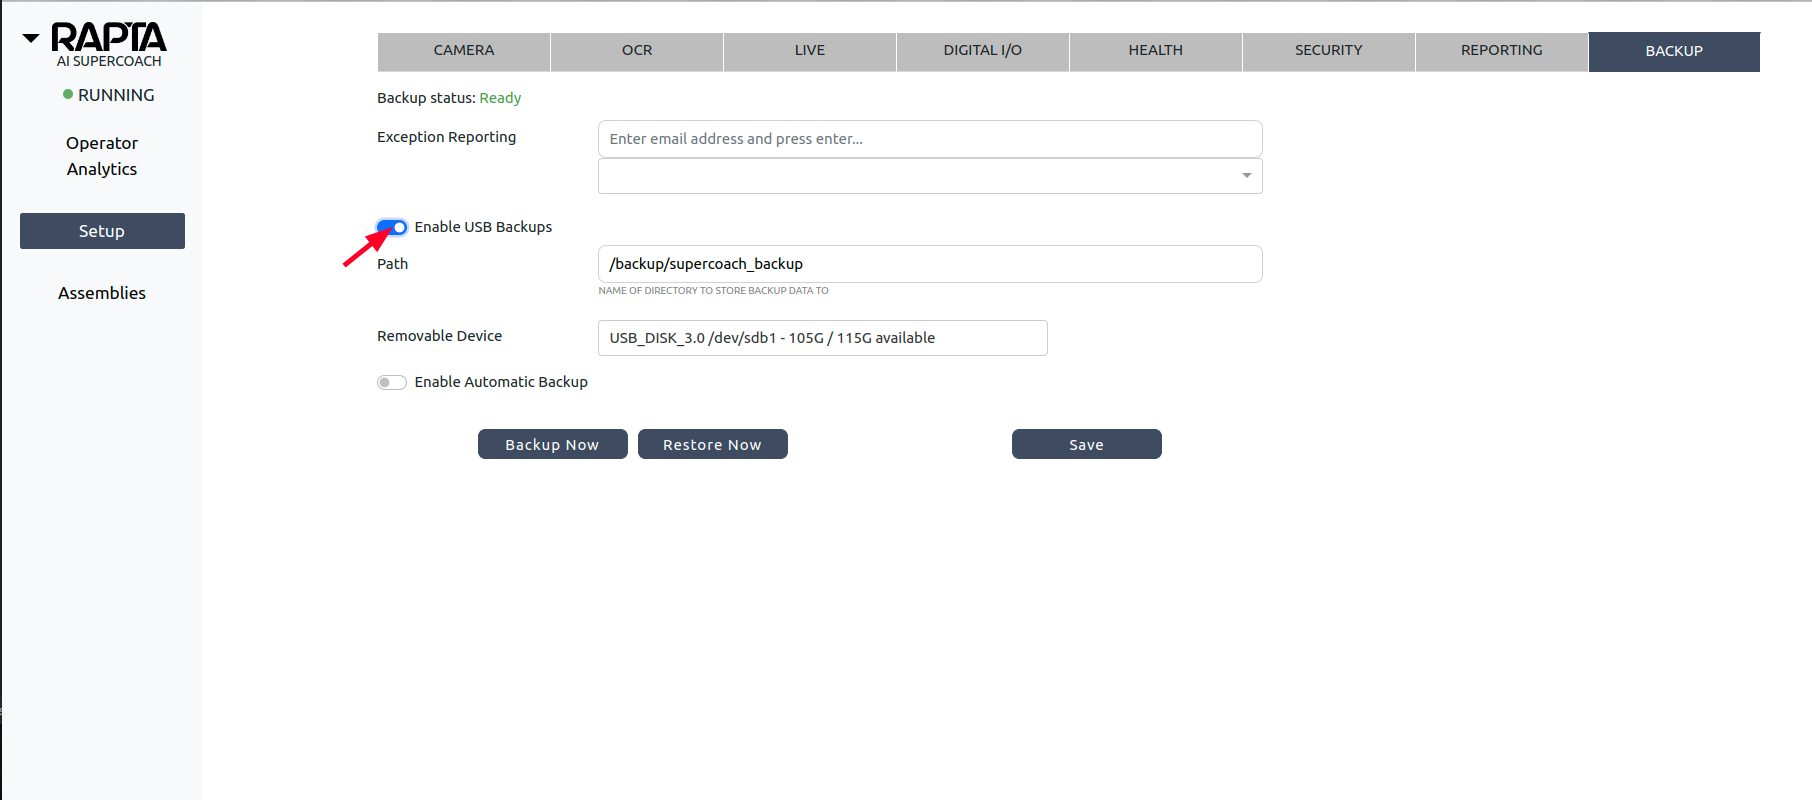
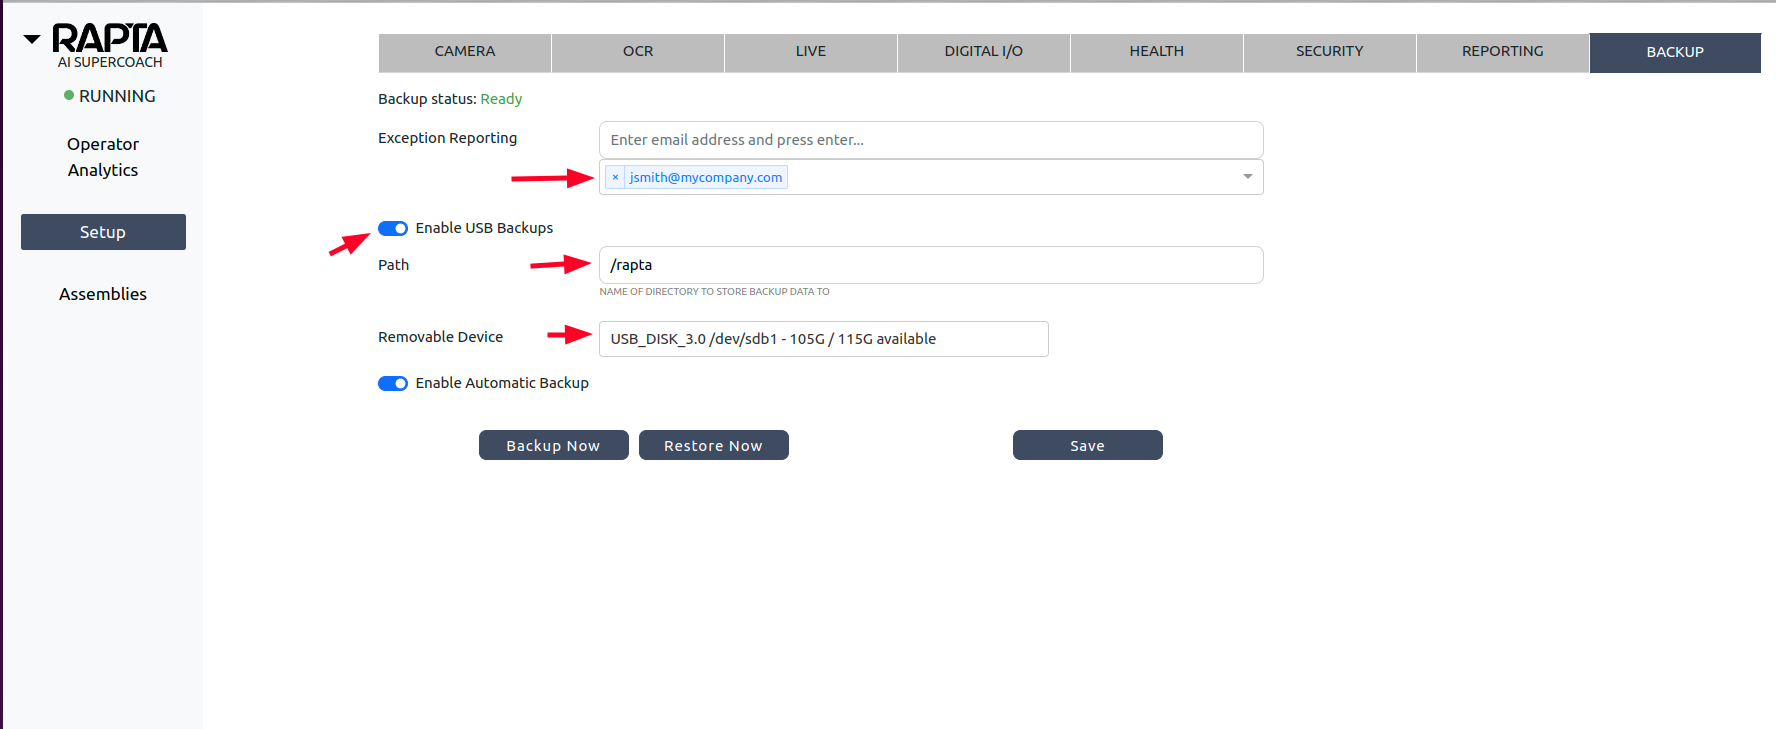
- Enable USB Backups using the toggle switch
- Configure Exception Reporting:
- Add an email address to receive USB backup issue notifications
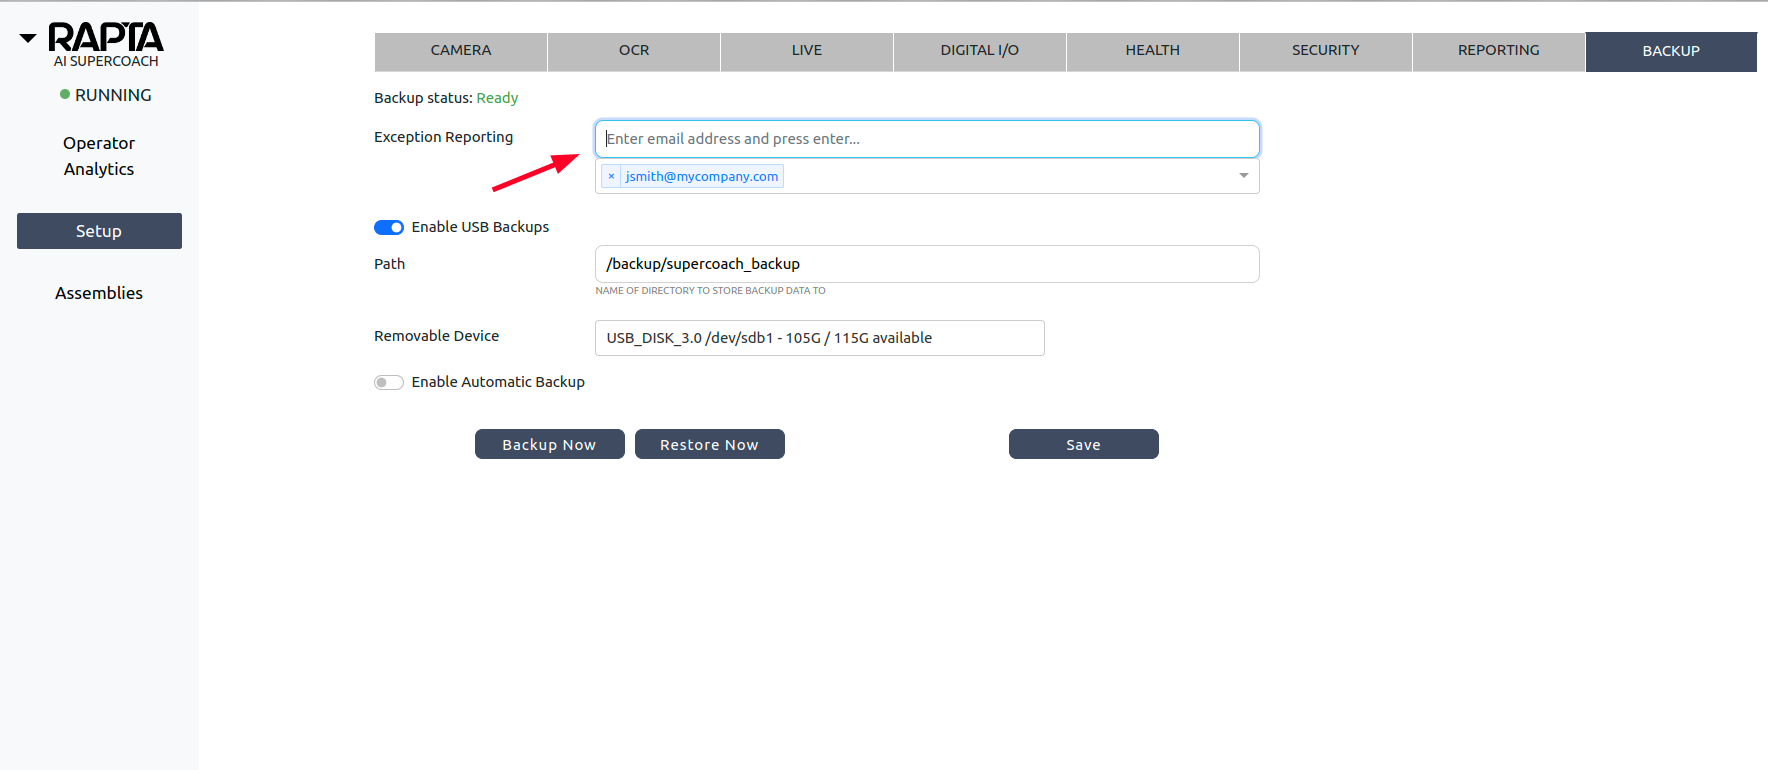
- Add an email address to receive USB backup issue notifications
- Set Backup Location:
- Enter the desired path on the USB drive where data should be saved
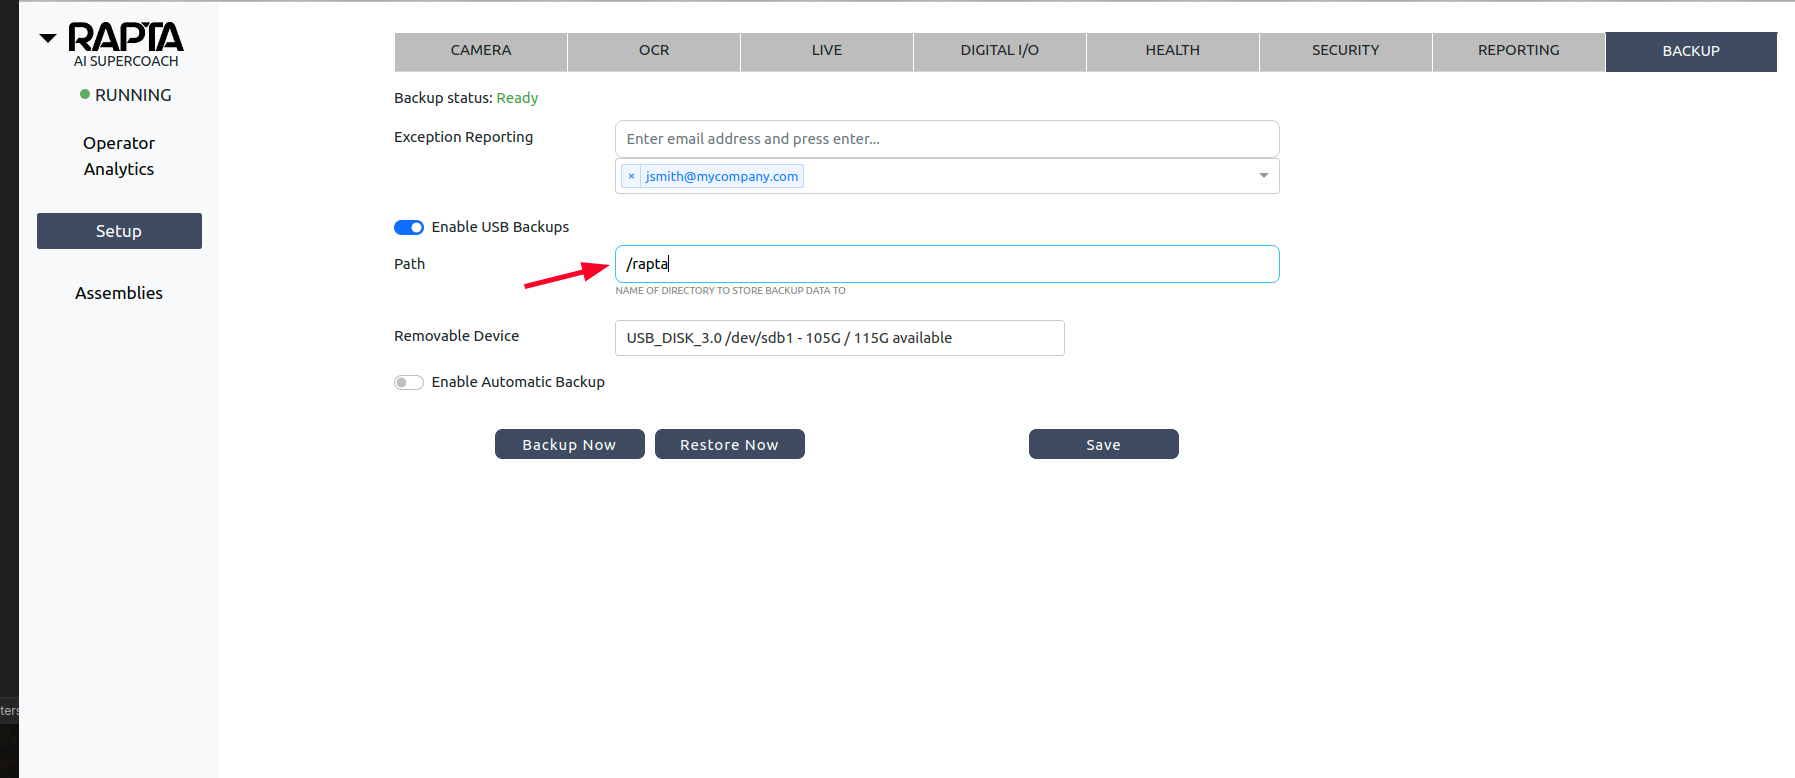
- Enter the desired path on the USB drive where data should be saved
- Verify Setup:
- Confirm the USB drive appears in the Removable Device field
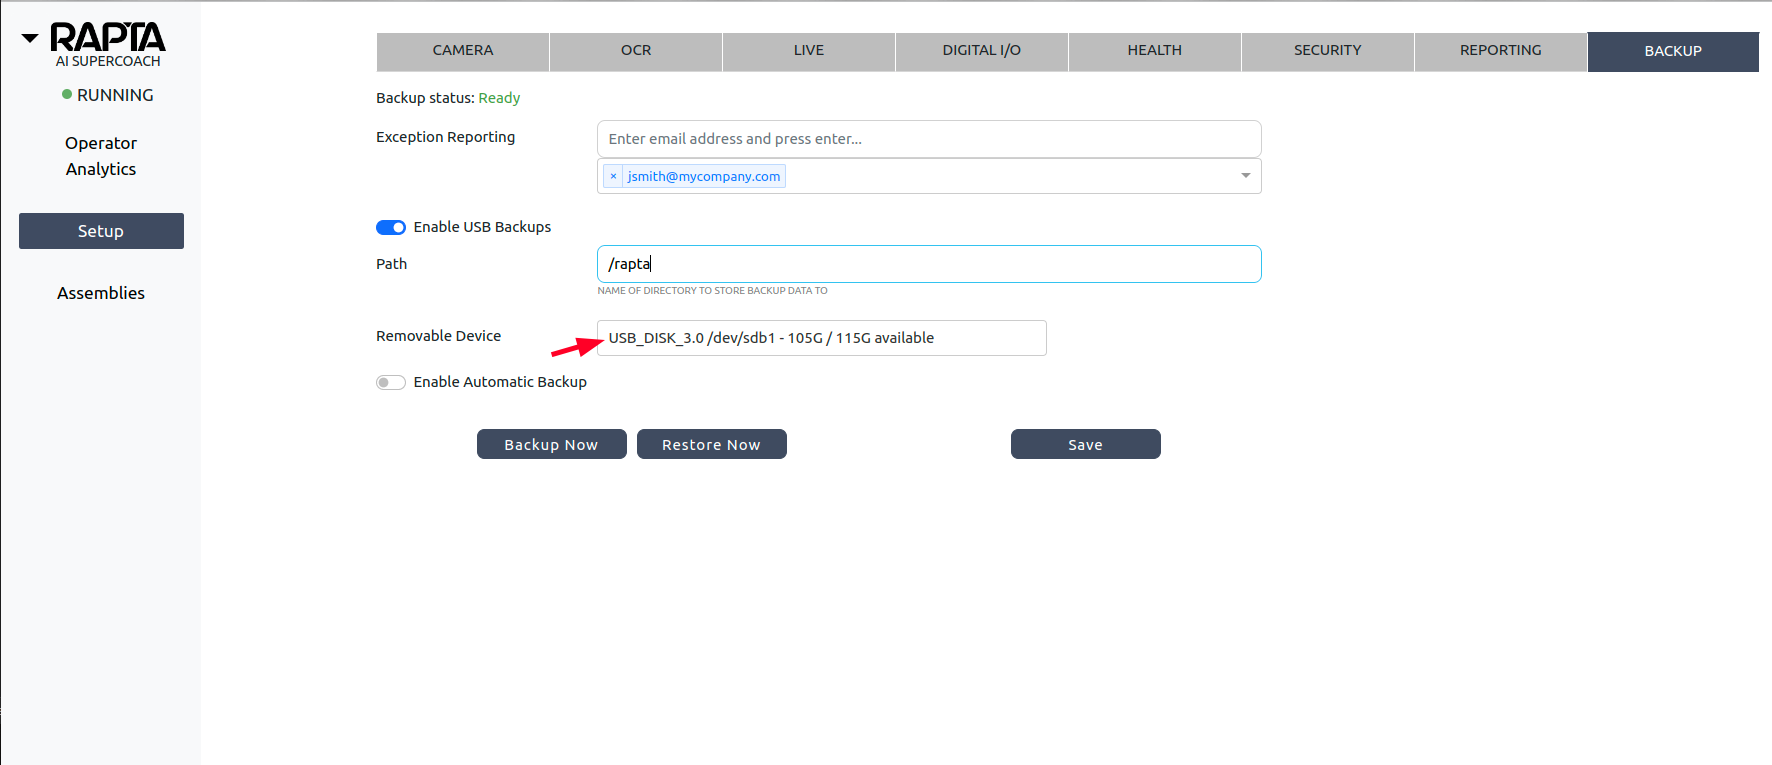
- Confirm the USB drive appears in the Removable Device field
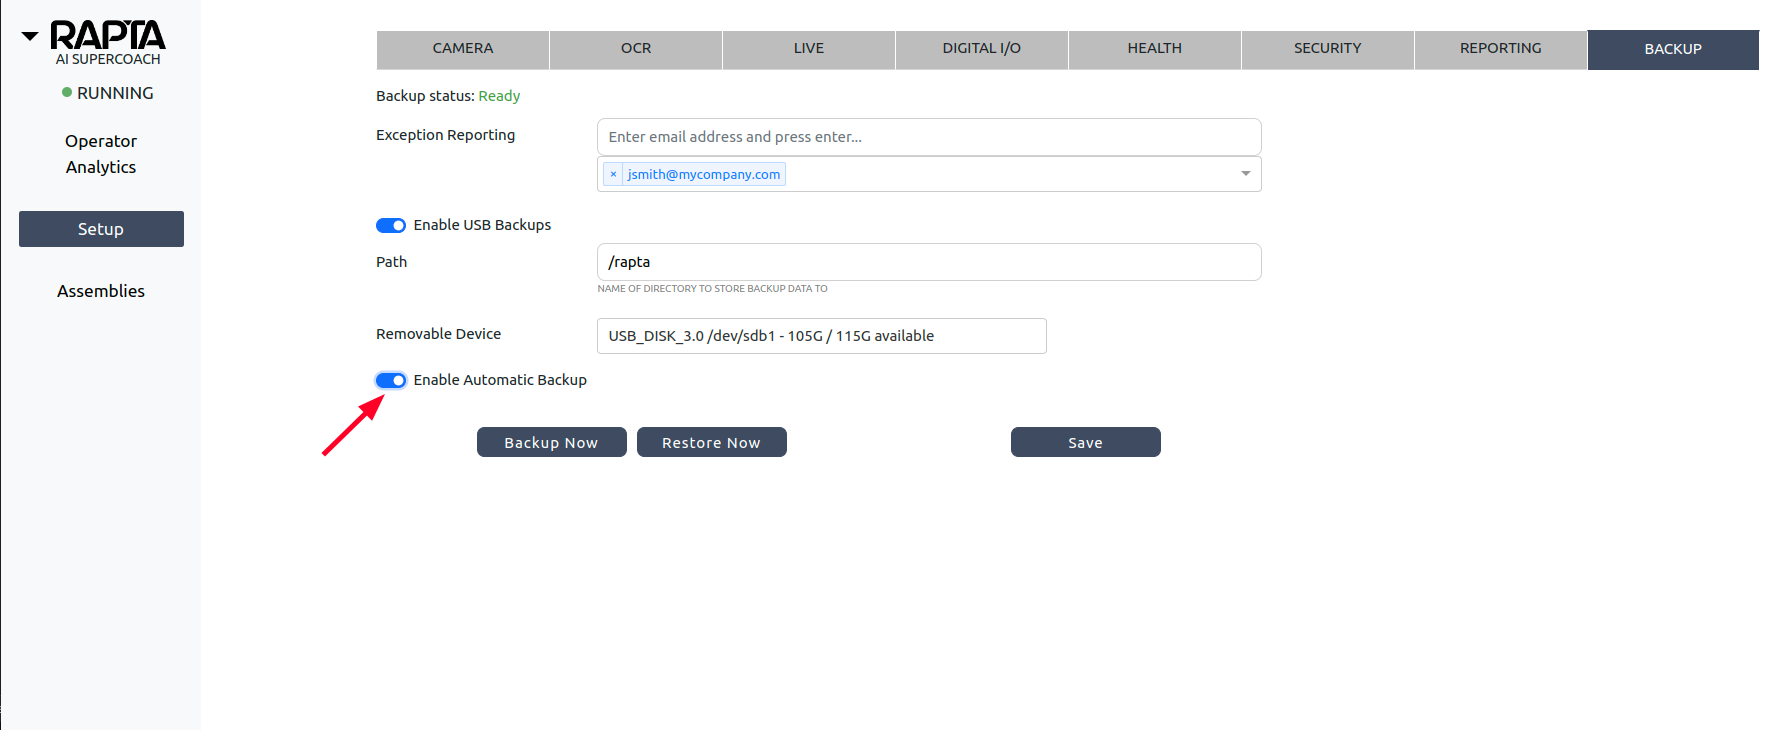
- Configure Automatic Backups (Optional):
- Enable the ‘Enable Automatic Backup’ toggle to create automatic backups every 3 hours
- Note: Automatic backups will only occur if system data has changed
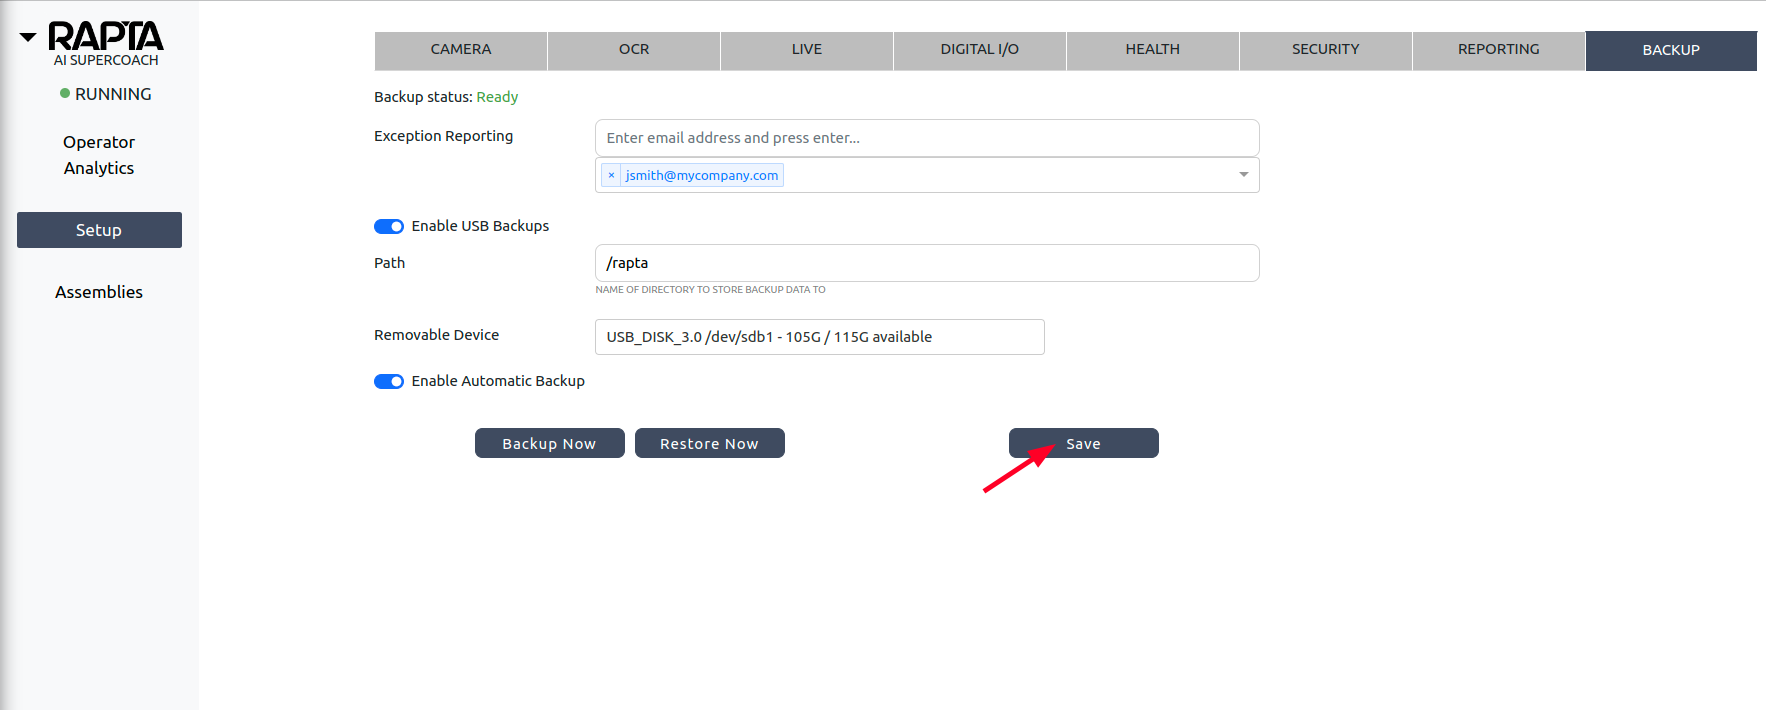
- Save the configuration by clicking the Save Button
Performing a Manual Backup
- Ensure all configuration steps above are completed
- Click the “Backup Now” button to initiate the backup
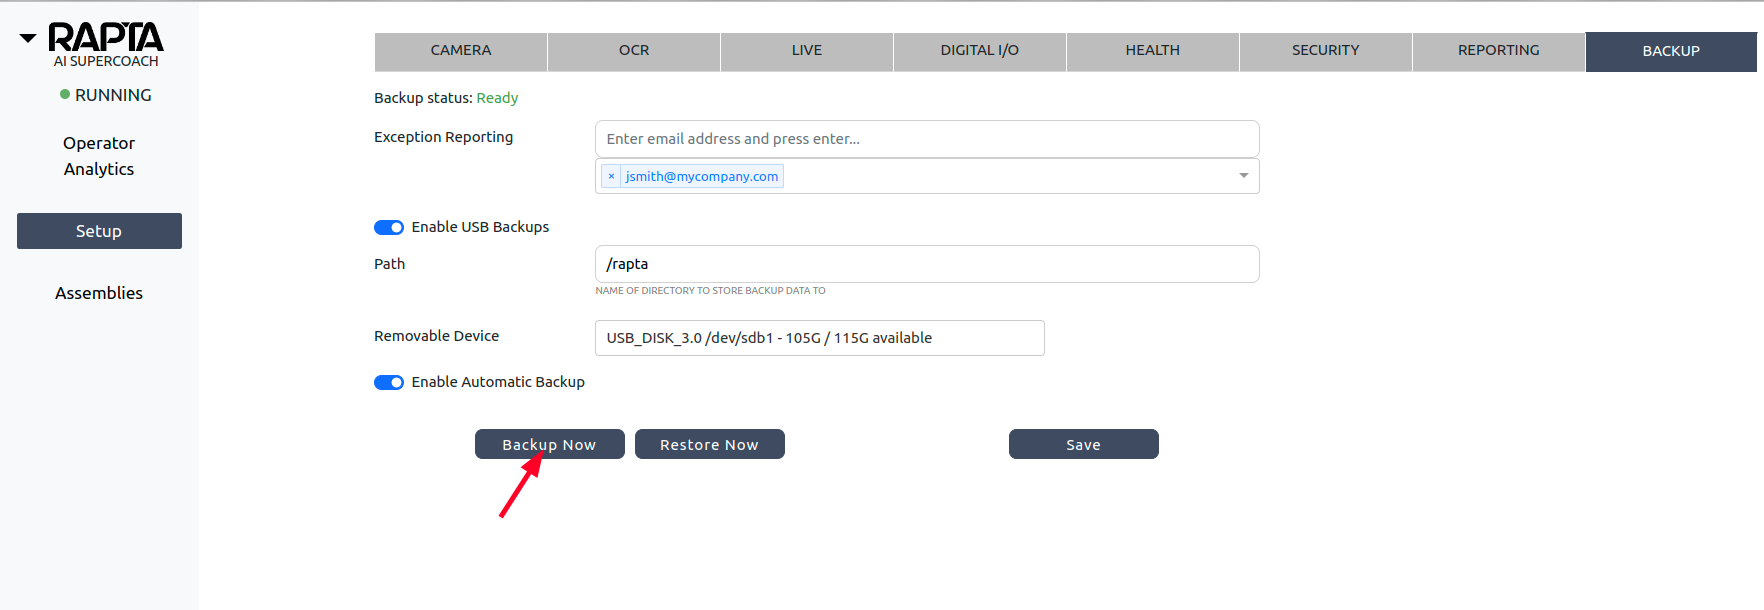
- Monitor the Backup Status indicator

- Wait for confirmation that the backup is complete

Restoring from a Backup
- Connect the USB drive containing the backup to the touch-panel computer
- Navigate to the Setup/Backup Page
- Verify the following settings:
- ‘Enable USB Backups’ is turned on
- Exception Reporting email address is correctly entered
- Backup path matches the location of your backup files
- USB drive is detected in the Removable Device field
- Click the ‘Restore Now’ button to begin the restoration process
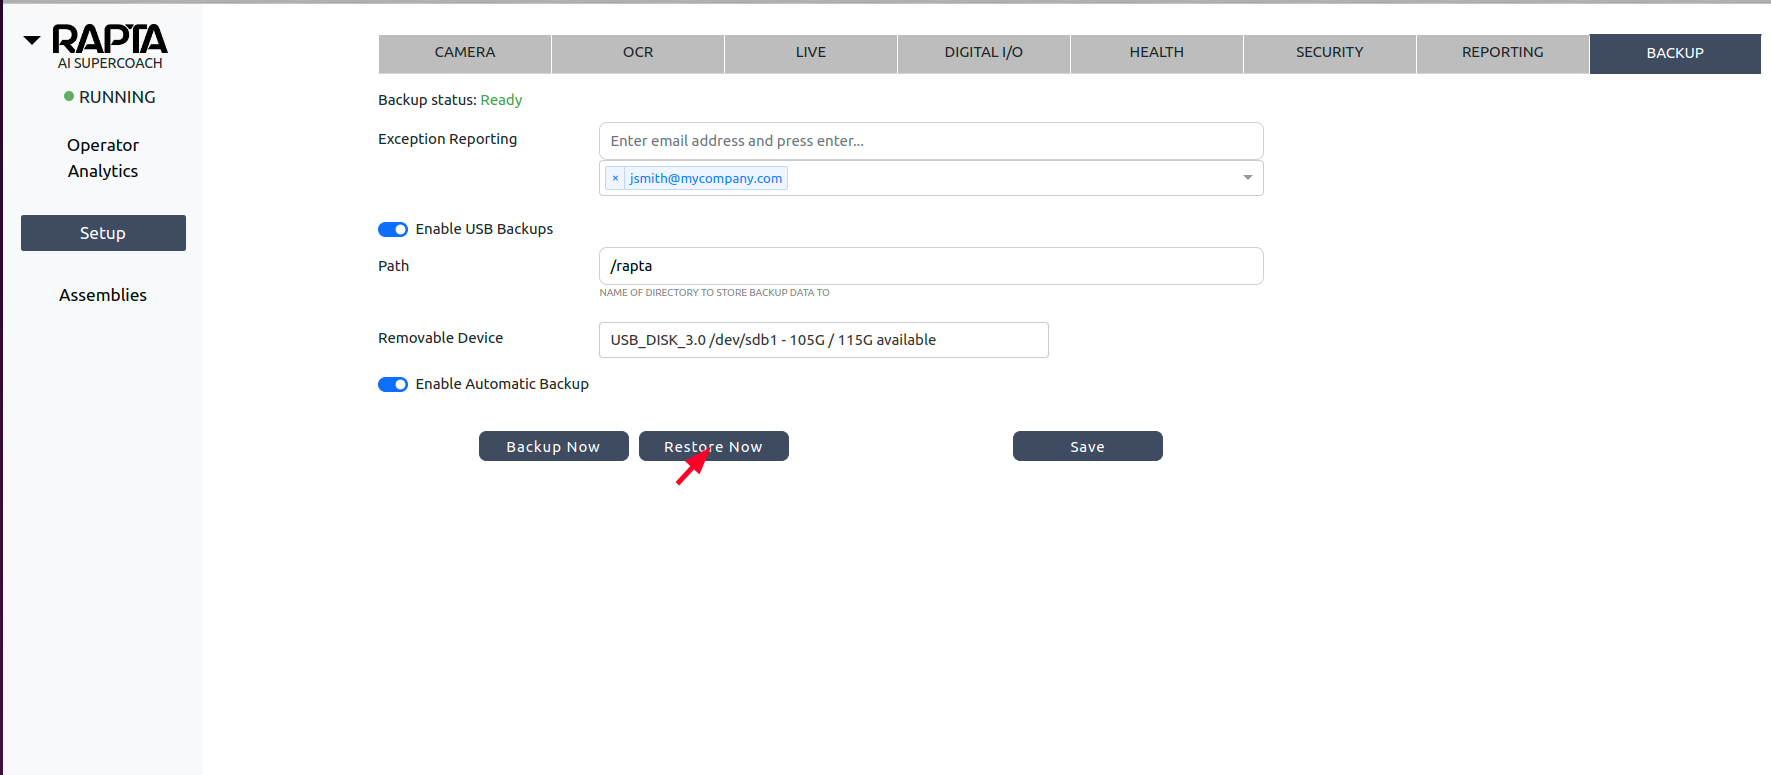
- Monitor the Backup Status indicator until the restoration is complete

⚠️ Important Notes for Restoration
- Do not disconnect the USB drive during the restoration process
- Ensure the system remains powered on throughout the restoration
- Wait for explicit confirmation that the restoration is complete before proceeding with any other operations
Additional Notes
- Ensure the USB drive is formatted as a FAT partition before attempting backup or restore operations
- Keep the backup drive in a secure location when not in use
- Monitor the specified email address for any backup-related issues
- Regular backups are recommended to maintain current system data
- Automatic backups provide an additional layer of data protection
- The system checks for changes every 3 hours and only creates new backups when necessary
