How to configure a new camera
Getting Started
NOTE: RAPTA SUPPLIED CAMERAS HAVE ALREADY BEEN THROUGH THIS SETUP PROCESS
Rapta supports Basler USB and PoE cameras. In order to configure the camera, you will need to download the Basler Pylon software suite here: https://www.baslerweb.com/en-us/downloads/software/
Camera Nomenclature
RAP_CAM_01 – Fixed camera systems where the number increments to designate each unique camera, must start at _01.
RAP_CAM_01_PD01 – 3-axis Superpod camera system where the _PD01 nomenclature designates a camera on a robotic axis
RAP_CAM_01_PR01 – 3-axis, 3 camera Precision inspection system where the _PR01 nomenclature designates a camera on a robotic axis
Configuring a USB Camera
The Cameras need to follow this naming convention:
| Camera | Device User ID (Standard, Non Robotic) | Device User ID (Single Camera Robotic SuperPod) | Device User ID (3 Camera Precision Robotic System) |
|---|---|---|---|
| First camera | RAP_CAM_01 | RAP_CAM_01_PD01 | RAP_CAM_01_PR01 |
| Second camera | RAP_CAM_02 | RAP_CAM_02 | RAP_CAM_02_PR01 |
| Third camera | RAP_CAM_03 | RAP_CAM_03 | RAP_CAM_03_PR01 |
| Fourth camera | RAP_CAM_04 | RAP_CAM_04 | RAP_CAM_04 |
| Fifth camera | RAP_CAM_05 | RAP_CAM_05 | RAP_CAM_05 |
Naming procedure:
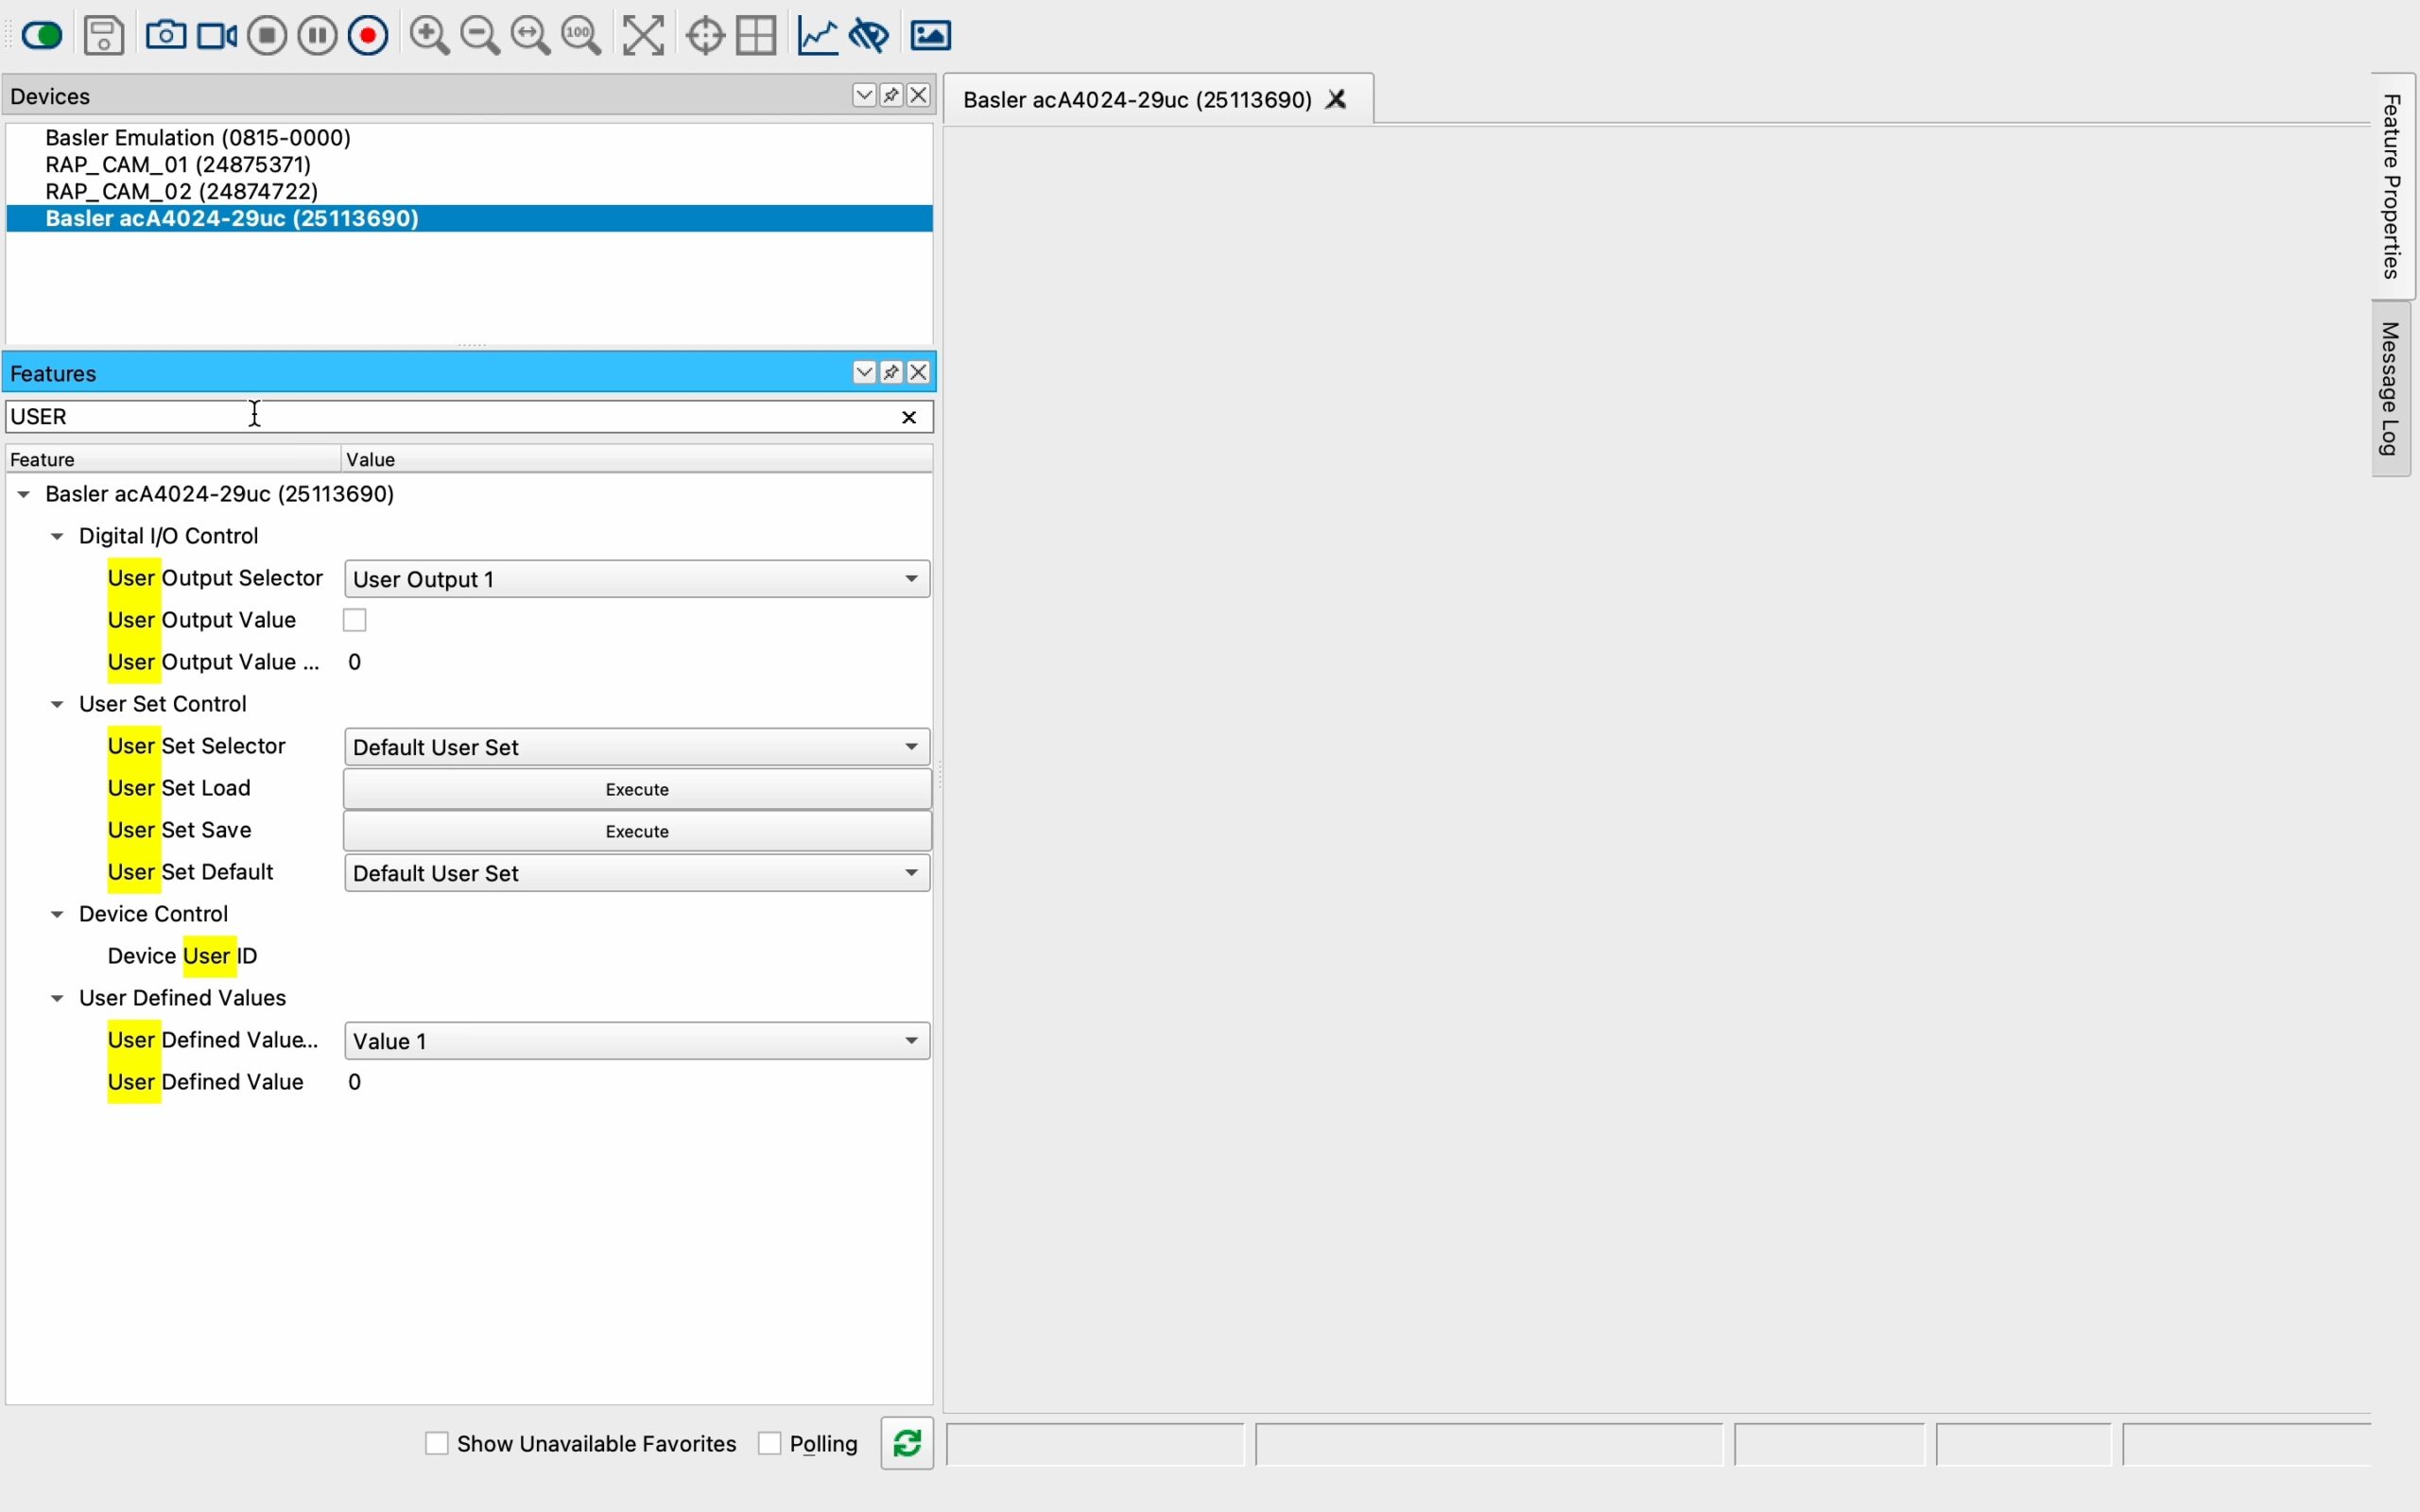
- Open the Basler Pylon software viewer and select the camera to be configured
- Select the Green switch in the top left
- Search for the USER ID field then enter the name RAP_CAM_0X where X is the camera number for that system.
This screen recording will show you a step by step example:
Configuring a PoE Camera
During the setup process, each industrial camera requires a unique name identifying the device and correct configuration of the Camera’s IP address. Rapta uses the camera vendors configuration tools to correctly set these fields, the example below is for Basler.
- Download the pylon IP Configurator from: https://docs.baslerweb.com/overview-of-the-pylon-ip-configurator.
- Connect your laptop or PC to the local Rapta switch and set your device to have the following IP address: 192.168.86.99
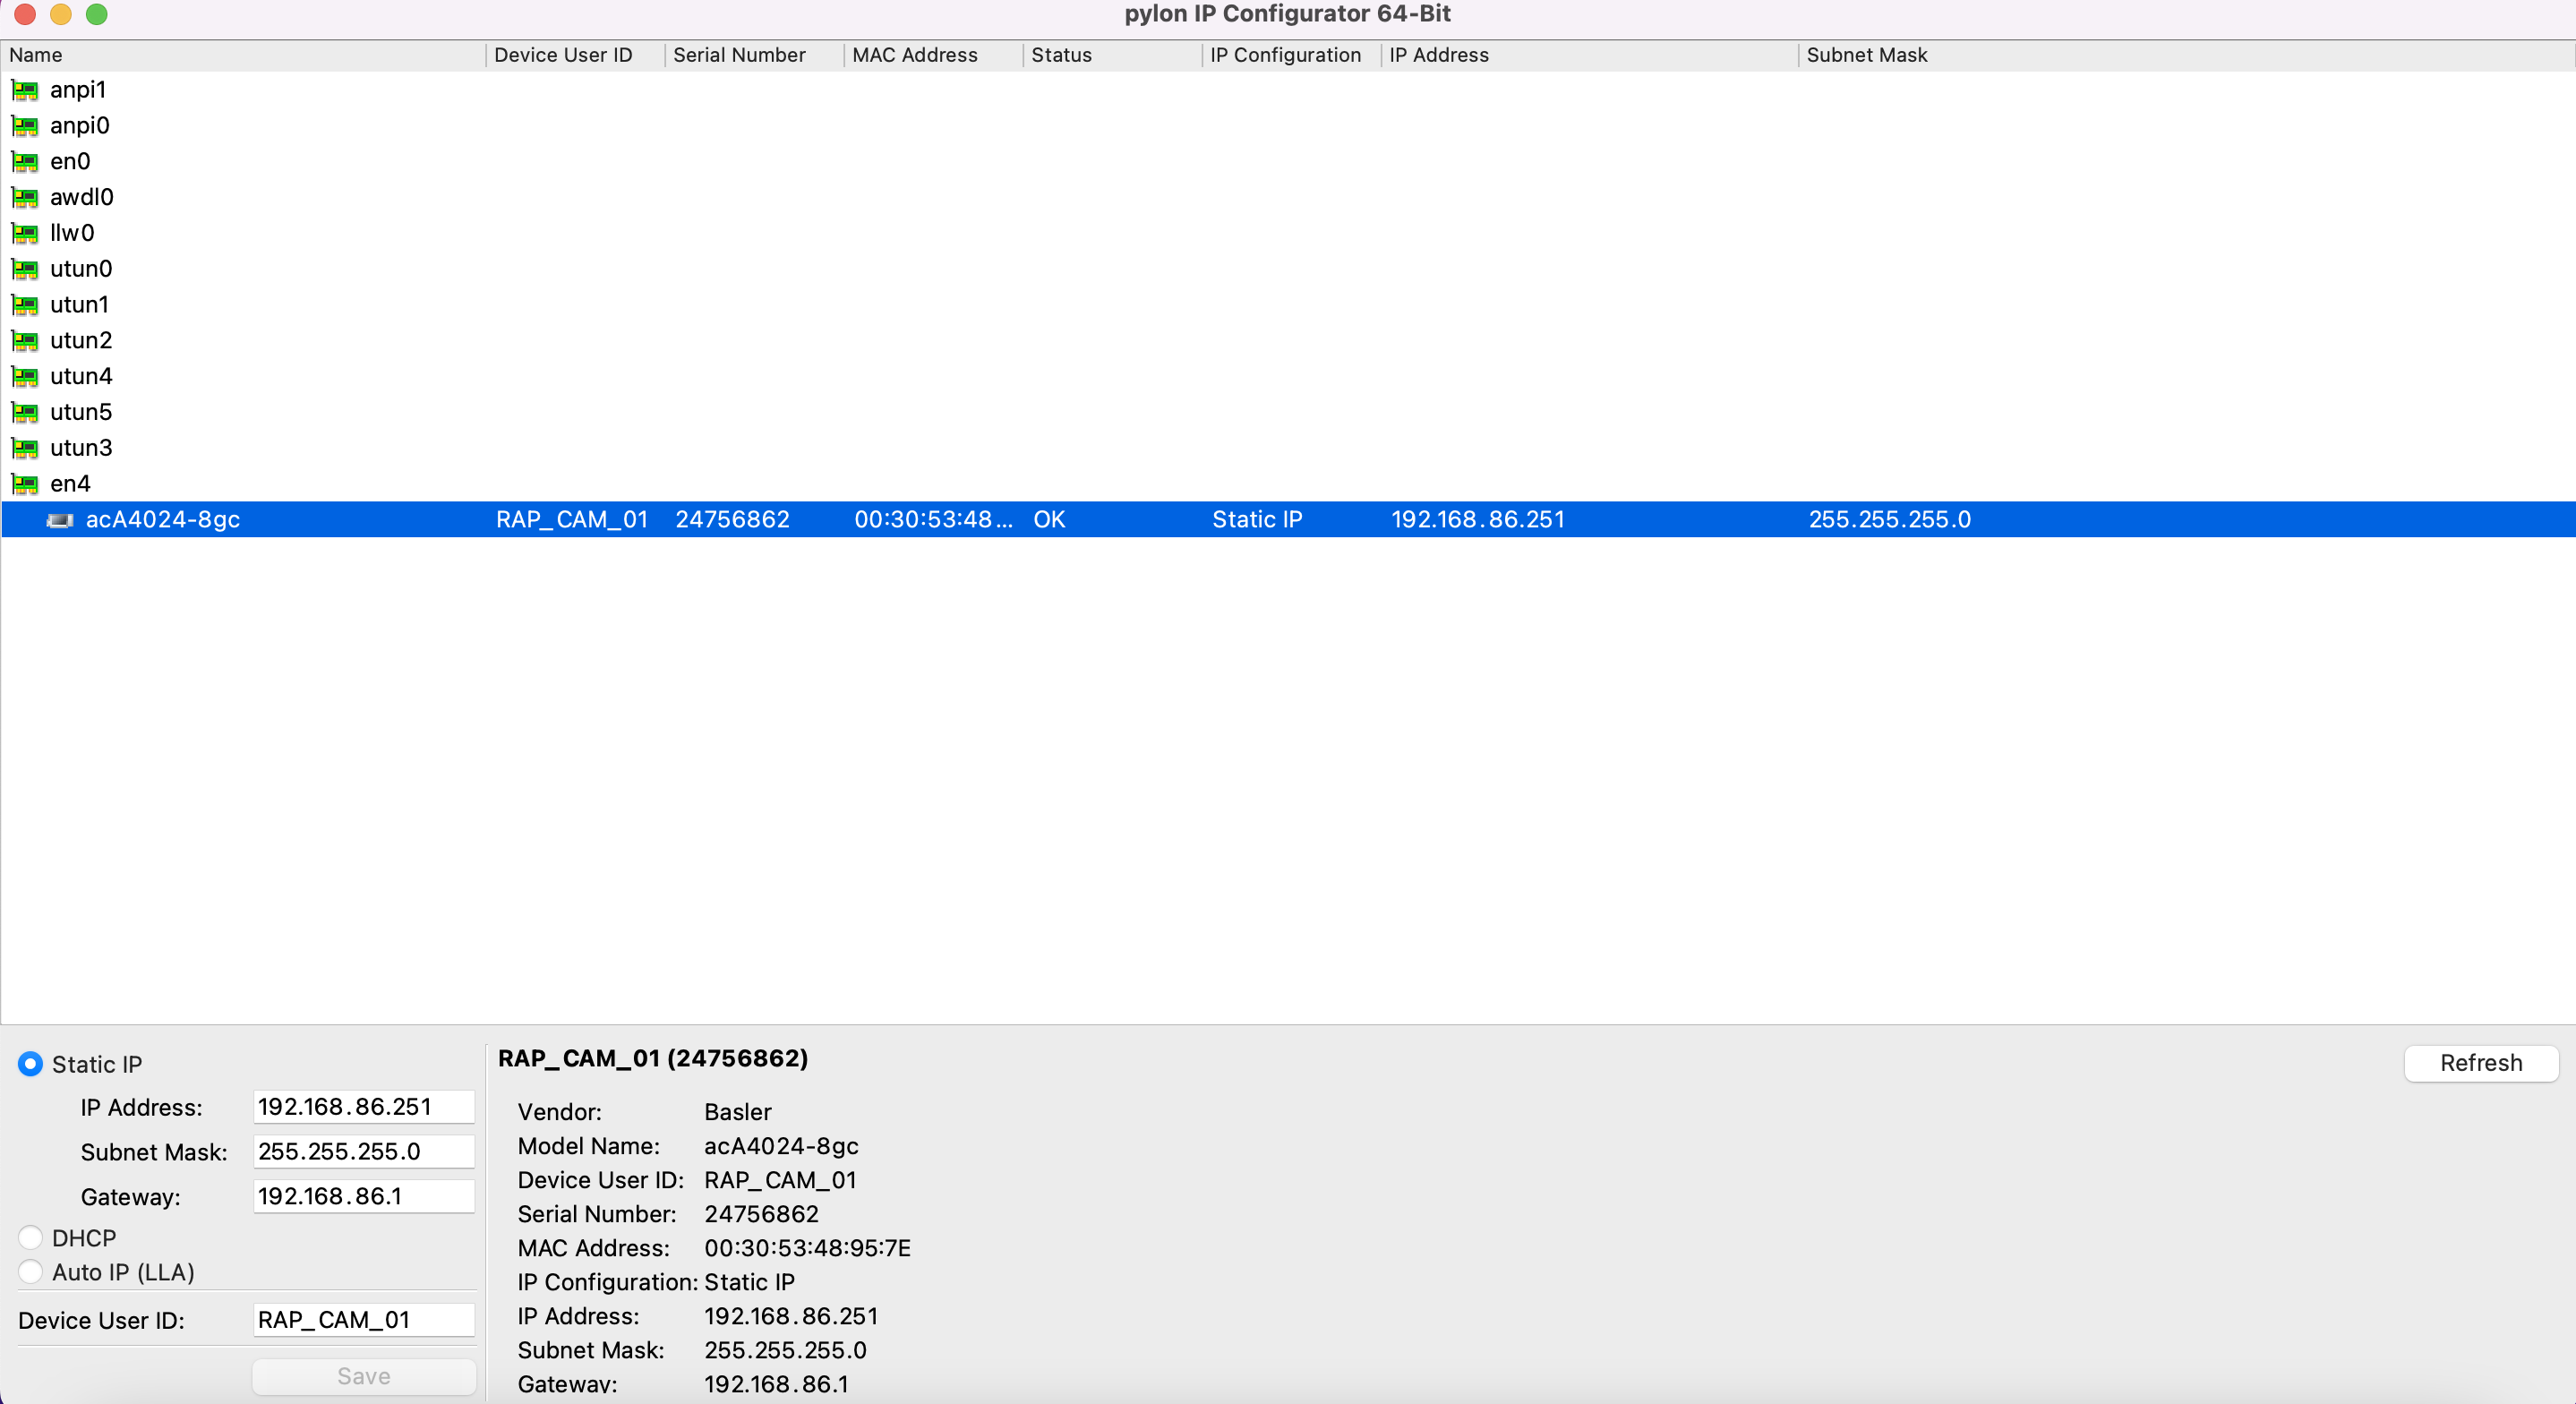
- Run the pylon IP Configurator application and you should see a list of available cameras per the screenshot below.
- By default the Basler cameras come supplied with DHCP as the default mode, this needs to be changed to “Static IP”.
- Configure the IP address and Device User ID per the able below.
| Camera | Device User ID (Standard, Non Robotic) | IP Address | Device User ID (Single Camera Robotic SuperPod) | Device User ID (3 Camera Precision Robotic System) |
|---|---|---|---|---|
| First camera | RAP_CAM_01 | 192.168.86.251 | RAP_CAM_01_PD01 | RAP_CAM_01_PR01 |
| Second camera | RAP_CAM_02 | 192.168.86.249 | RAP_CAM_02 | RAP_CAM_02_PR01 |
| Third camera | RAP_CAM_03 | 192.168.86.248 | RAP_CAM_03 | RAP_CAM_03_PR01 |
| Fourth camera | RAP_CAM_04 | 192.168.86.247 | RAP_CAM_04 | RAP_CAM_04 |
| Fifth camera | RAP_CAM_05 | 192.168.86.246 | RAP_CAM_05 | RAP_CAM_05 |
Important notes:
- The Gateway field does not need to be set, this is optional.
- If you set duplicate IP addresses or device ID’s the system will not function correctly.
Example pylon IP Configuration
The following is a screen capture from the pylon IP Configurator app.
Capturing the PFS File
If the Camera is unknown to the Rapta software, then the Basler Camera PFS file will need to be captured and saved using the following procedure. https://docs.baslerweb.com/knowledge/saving-camera-features-or-user-sets-as-a-file-on-hard-disk
Help and Support
If you run into any issues get in touch with our support team by filing a ticket on our help desk: